
A solar-ready consumer unit is a distribution board prepared to accept the output from a solar inverter safely, without requiring a full service upgrade or rewire. If your current board has spare ways, individual RCBO protection on every circuit, a metal-clad enclosure, a Type 2 surge protection device (SPD), and clear labelling for an alternative supply connection point, it is likely solar-ready. If it lacks any of those, you probably need an upgrade before panels go on the roof.
Four quick checks you can do right now:
- Spare ways: at least two free slots on the busbar (solar and battery each need one)
- RCBO protection: individual combined MCB and RCD devices on circuits, not shared RCD banks
- Metal enclosure: a metal-clad board, not the older cream or white plastic type
- SPD fitted: a Type 2 surge protection device already installed or a dedicated slot for one
If any of these are missing, book an electrical inspection before you commit to a solar quote. An installer such as Smarthometechnical will carry out a pre-survey to confirm exactly what your board needs.
Key takeaways
A solar-ready consumer unit needs a metal-clad enclosure, individual RCBO protection, a Type 2 SPD, and at least two spare ways to accept a solar inverter safely under BS 7671.
| Point | Details |
|---|---|
| Definition | A solar-ready consumer unit is a distribution board prepared to accept inverter output without a service upgrade. |
| Four immediate checks | Metal enclosure, individual RCBOs, Type 2 SPD fitted, and at least two spare ways on the busbar. |
| AC vs DC distinction | AC units protect inverter output at household voltage; DC combiners protect panel strings at 600–1,000 V dc. |
| Upgrade triggers | Plastic pre-Amendment 3 enclosure, shared RCD banks, no spare ways, or absent surge protection. |
| Compliance requirement | All consumer unit work is notifiable under Part P; expect an EIC, MCS certificate, and board labelling on completion. |
Table of Contents
- What is a solar consumer unit and why do installers call it “solar-ready”?
- AC vs DC solar consumer units: what each one protects
- Core features and components to look for in a solar-compatible consumer unit
- How to tell if your existing consumer unit is solar-ready
- Do you need a new consumer unit? When an upgrade is required
- UK compliance, safety, and who must carry out the work
- Typical costs and timeline for a consumer unit assessment and upgrade
- When you need external or IP65-rated solar distribution equipment
- How Smarthometechnical assesses a consumer unit during a pre-solar survey
- An installer’s perspective on why the pre-survey matters
- Sources
What is a solar consumer unit and why do installers call it “solar-ready”?
A solar consumer unit is not a panel that generates electricity. It is the distribution point that manages and protects the electrical supply coming from your inverter before it reaches your household circuits or feeds back to the grid. Think of it as the traffic controller between your roof and your home’s wiring.
The phrase “solar-ready” describes a board that has been designed or upgraded so an inverter can land on it without modification. Solar-ready electrical panels typically use a busbar rated higher than the main breaker, for example a 225 A busbar paired with a 200 A main breaker, so the board can absorb inverter backfeed without de-rating the main service. That headroom is the practical reason installers favour these boards: it helps avoid a costly service upgrade when adding a solar PV system.
Manufacturers such as Eaton build factory-installed labelling, higher busbar ratings, and dedicated PV landing points into their solar-ready loadcentres, which speeds up installation and keeps compliance markings straightforward. In the UK, the equivalent approach is a metal-clad consumer unit populated with RCBOs, a dedicated isolator position, and pre-planned capacity for the inverter circuit.
Not every solar install needs a full consumer unit replacement. The right board depends on the role it is protecting: some installations only need a compact surge-protected enclosure mounted near the inverter, while others genuinely require a new main board with additional ways and integrated protection.
| Feature | Typical specification |
|---|---|
| Busbar rating | Standard ratings with higher capacity used for solar-ready boards |
| DC voltage range (combiner) | 600 V dc to 1,000 V dc depending on string configuration |
| AC enclosure type | Metal-clad (required under BS 7671 Amendment 3) |
| IP rating (outdoor combiner) | IP65 minimum for external or exposed locations |
| Spare ways recommended | 2–4 for solar, battery, and future EV charger circuit |
AC vs DC solar consumer units: what each one protects
This is the distinction most homeowners never hear about, yet it determines what your installer actually quotes for.
AC solar consumer units sit on the output side of the inverter. The inverter converts DC electricity from the panels into standard AC household current, and the AC consumer unit then distributes and protects those circuits at normal household voltages (230 V AC in the UK). This is the board most people picture: it houses the RCBO for the inverter feed, the main isolator, and the SPD. On a typical domestic install, this is either a dedicated small enclosure mounted near the inverter or the upgraded main consumer unit itself.
DC PV combiner units sit on the input side of the inverter, combining multiple strings of solar panels into a single DC feed. They operate at much higher voltages, typically 600 V dc to 1,000 V dc, and use fused string inputs and sometimes blocking diodes to prevent reverse current. Because they handle high-voltage DC, they must be rated and labelled accordingly, and they are almost always housed in a separate enclosure from the AC board.
| AC consumer unit | DC combiner / PV combiner box | |
|---|---|---|
| Position in system | Inverter output to house circuits | Panel strings to inverter input |
| Voltage | 230 V AC (household) | 600–1,000 V DC |
| Key protection devices | RCBO, double-pole isolator, SPD | Fused string inputs, blocking diodes, DC isolator |
| Enclosure location | Indoors (meter cupboard, utility room) | Can be outdoors; IP65 required |
| When you see it | Every grid-tied domestic install | Multi-string arrays; string inverters with separate combiner |
For a straightforward single-string domestic install with a hybrid inverter, you may never need a separate DC combiner box at all. The inverter handles string protection internally. Where you will see a standalone combiner is on larger arrays with multiple strings, or where the inverter is sited far from the panels and a remote combiner keeps cable runs manageable.
Outdoor DC combiner boxes are rated at IP65 as a minimum for exposed locations, with DC voltage ratings and string input counts specified on the product label. If your installer proposes an external combiner, ask to see those ratings in writing.
Core features and components to look for in a solar-compatible consumer unit
A solar-compatible board is not just a box with spare slots. Each component has a specific job, and missing one creates a compliance or safety gap.
RCBO (Residual Current Breaker with Overcurrent protection) combines the function of an MCB and an RCD in a single device. Individual RCBOs on every circuit mean that a fault on one circuit trips only that circuit, not half the house. Inverters can produce a small DC leakage current that causes nuisance tripping on shared RCD banks, which is why many renewable installers now favour full RCBO populations over the older split-load arrangement.
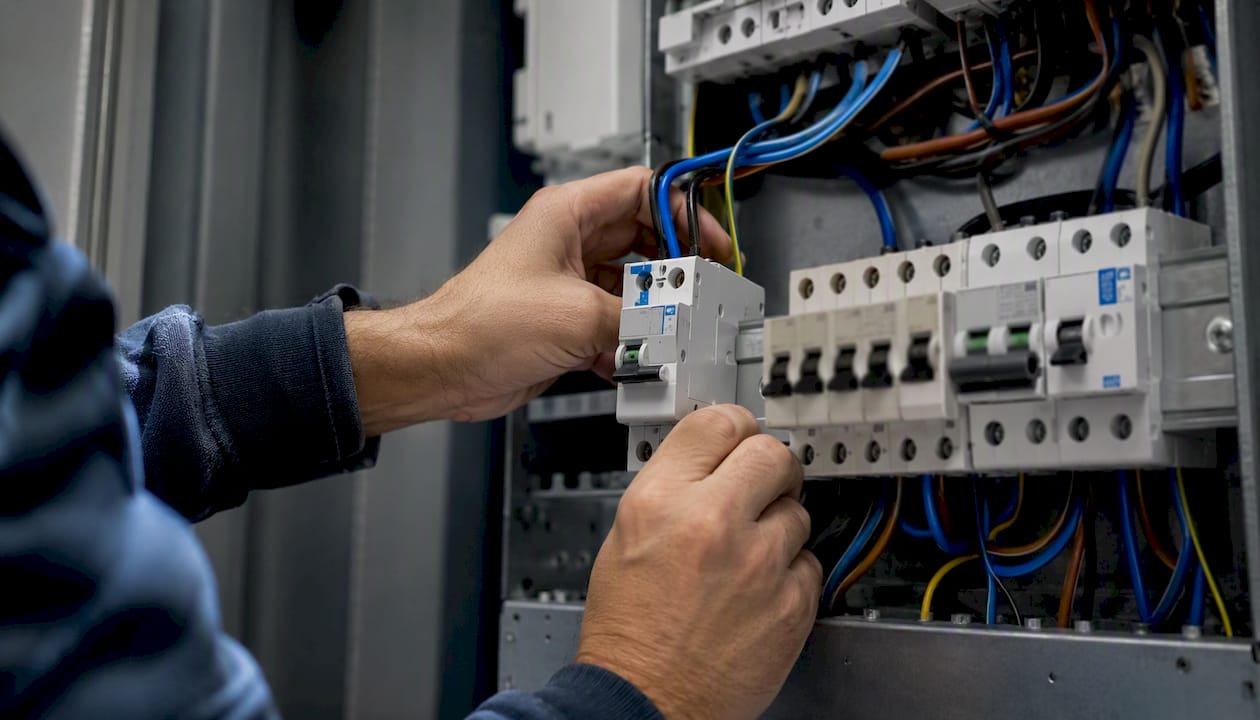
Rotary isolator / double-pole isolator provides a visible, lockable means of isolating the inverter supply from the board. This is a safety requirement under BS 7671 for any alternative supply connection, and it is what a firefighter or engineer will reach for in an emergency.
Generation (kWh) meter records how much electricity your panels produce. It is separate from your import/export meter and is often required by your DNO (Distribution Network Operator) or for MCS certification purposes. Some tariffs and Smart Export Guarantee payments depend on accurate generation data.
Type 2 SPD (Surge Protection Device) clamps voltage spikes caused by lightning or grid switching events before they can damage the inverter or household appliances. BS 7671 Amendment 3 introduced requirements for SPDs in many domestic installations, and a solar install without one is increasingly difficult to certify correctly.
Spare ways are empty slots on the busbar. A solar system with battery storage typically uses multiple ways: one for the inverter AC output, one for the battery charger/inverter, and possibly one for an EV charger if planned. A board with no spare ways needs replacing before any of this can happen.
Pro Tip: Ask your installer whether your inverter produces a pure sine wave or has any DC offset. Some hybrid inverters generate enough DC leakage to require a Type B RCBO rather than the more common Type A. Type B devices are significantly more expensive, so knowing this upfront avoids a surprise on the invoice.
How to tell if your existing consumer unit is solar-ready
You do not need to be an electrician to gather the information your installer needs. Here is what to do before the survey.
-
Photograph the board. Open the consumer unit cover (do not touch any wiring) and take a clear photo of the full board, including any labelling on the inside of the door. Send this to your installer before they arrive.
-
Count the spare ways. Count the total number of slots on the busbar and subtract the number of breakers currently fitted. If the answer is fewer than two, flag it immediately.
-
Note the enclosure material. Metal-clad boards are grey or silver. Older plastic boards are cream or white. A plastic pre-Amendment 3 board will need replacing regardless of how many spare ways it has.
-
Check for a Type 2 SPD. This is usually a small device with a green indicator window, often labelled “SPD” or “surge protector”. If you cannot see one, note that it is absent.
-
Identify the main incoming supply position. Note where the meter tails enter the board and whether there is physical space around the board for additional wiring. A cramped meter cupboard can add cost to any upgrade.
-
Look for shared RCD banks. If you see two large RCD switches with groups of smaller MCBs beneath each one, that is a split-load arrangement. It is not automatically a problem, but it is worth flagging.
Three red flags to report to your installer straight away:
- A cream or white plastic enclosure (pre-Amendment 3, non-compliant for new solar installs)
- Shared RCD banks with no individual RCBOs (nuisance tripping risk from inverter leakage)
- Zero spare ways and no obvious room to expand the board
During the survey itself, a competent installer will check the busbar rating, confirm the presence or absence of an SPD, verify labelling for alternative supplies, and assess the meter position relative to the proposed inverter landing point. Simple preparatory steps like ensuring there is conduit space to the board and adequate room around the service panel can make the difference between a half-day job and a two-day job.
Do you need a new consumer unit? When an upgrade is required
Not every solar install triggers a full consumer unit replacement. The decision comes down to five practical factors.
Age and enclosure type are the most common triggers. A plastic consumer unit installed before the 2016 Amendment 3 to BS 7671 is not compliant for new solar installations and usually needs replacement if it lacks necessary features.
Insufficient spare ways force a replacement when there is simply no room on the busbar for the inverter circuit, battery circuit, or both. A board with insufficient spare ways to accommodate proposed solar and battery circuits usually requires replacement.
Shared RCD banks without individual RCBOs are a compliance and nuisance-tripping risk. Inverters can produce DC leakage that trips a shared RCD, cutting power to an entire bank of circuits. Replacing the board with a fully RCBO-populated unit resolves this cleanly.
No surge protection is increasingly a reason to upgrade rather than retrofit, since fitting an SPD to an old board can be awkward and may not satisfy an inspector if the board itself is non-compliant.
Crowded or inaccessible wiring adds risk to any modification. If an installer cannot safely work in the existing enclosure, replacement is the safer and often cheaper long-term option.
To put this in practical terms: a small bungalow with a single-string 4 kWp inverter and a modern metal-clad board with three spare ways may only need a compact AC enclosure mounted near the inverter, costing a fraction of a full board replacement. A larger property with multiple solar strings, a battery system, and an EV charger planned in the future generally needs a new main consumer unit with a higher number of ways and full RCBO protection. The correct board depends on the inverter design, protection strategy, and install location, not on a single product label.
As a rule of thumb, solar plus battery uses two to four ways. Add an EV charger and you need at least one more. Plan for that now rather than returning to the board in two years.
UK compliance, safety, and who must carry out the work
Consumer unit work is notifiable under Part P of the Building Regulations in England. That means it must be carried out by a competent person registered with an approved scheme, or notified to your local authority building control. This is not optional, and an uncertified board change will cause problems when you sell the property.
The governing standard is BS 7671, the IET Wiring Regulations, currently in its 18th Edition with Amendment 3. Amendment 3 introduced the requirement for metal-clad consumer unit enclosures in domestic premises and tightened requirements around SPDs and labelling for alternative supplies. Any solar installation that touches the consumer unit must comply with this edition.
Documents you should receive on completion:
- Electrical Installation Certificate (EIC) or Minor Works Certificate, signed by the installing electrician
- Commissioning sheet from the inverter manufacturer or installer
- MCS certificate if the installation is MCS-certified (required for Smart Export Guarantee payments)
- Descriptive labelling on the board itself, identifying the inverter circuit, isolator, and SPD
Accreditations to look for on any quote:
- MCS (Microgeneration Certification Scheme): required for SEG tariff eligibility
- NICEIC or NAPIT membership: demonstrates competence for electrical installation work under Part P
- Public liability insurance details and the installer’s registered company number
An installer who cannot provide all of the above is not one you want working on your consumer unit.
Typical costs and timeline for a consumer unit assessment and upgrade
Costs vary by property, board condition, and location, but the following bands give you a realistic starting point for budgeting.
A pre-survey electrical assessment is often included in a solar installation quote from a competent installer. Where it is charged separately, expect to pay in the region of £75–£150 for a standalone electrical inspection report.
A compact AC solar enclosure (a small dedicated board mounted near the inverter, rather than a full replacement) typically costs £150–£350 fitted, depending on the components specified and cable runs involved.
A full consumer unit replacement with a metal-clad board, full RCBO population, Type 2 SPD, and labelling typically falls in the range of £400–£900 for the board work alone, before the solar installation itself. Factors that push the cost higher include a difficult meter position, long cable runs to the inverter landing point, and the need to re-route existing wiring.
Timeline from first contact to commissioned system:
- Pre-survey and quote: typically one to two weeks from enquiry
- Lead time for metal-clad units with full RCBO population: usually available within a few days from electrical wholesalers, though specific busbar ratings or bespoke configurations may take longer
- On-site consumer unit replacement: usually a half day to a full day
- Solar panel installation and commissioning: one to two days for a typical domestic array
- Certification and MCS documentation: issued within a few days of completion
The total elapsed time from survey to commissioned system is commonly four to eight weeks, depending on installer availability and DNO notification requirements for grid connection.
When you need external or IP65-rated solar distribution equipment
Most domestic solar installs keep all distribution equipment indoors. There are situations, though, where an external or weatherproof enclosure is the right call.
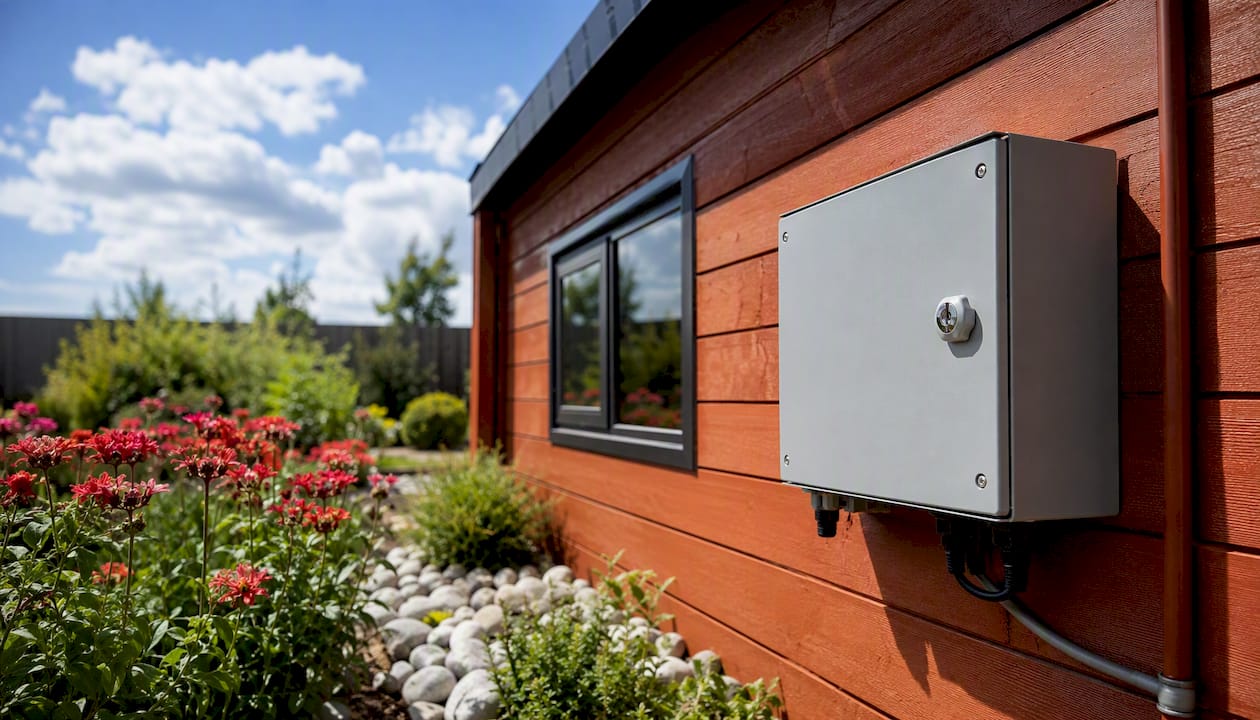
If your inverter is sited in a garage, outbuilding, or external plant room, any distribution equipment in that space needs an IP rating appropriate to the environment. IP65 is the standard minimum for outdoor or exposed locations: it means the enclosure is dust-tight and protected against water jets from any direction. An IP44 enclosure in a damp garage is not adequate.
Long string runs are another trigger. Where panels are spread across multiple roof aspects and the cable run to the inverter would be impractically long, a remote DC combiner box mounted closer to the panels keeps voltage drop manageable and reduces the risk of high-voltage DC cable running through the building. That combiner box will be outdoors or in a roof space, and it needs to be rated accordingly.
Spec lines to ask your installer about for any external equipment:
- IP rating: IP65 as a minimum for outdoor or exposed locations
- DC voltage rating: 600 V dc for most residential string inverters; 1,000 V dc for larger or commercial-grade systems
- Number of string inputs: matched to the number of panel strings in the array
- Fused string inputs: individual fuses per string for fault protection
- Surge protection option: some combiner boxes accept an integrated SPD module
A simple spec line to give an installer if you are discussing options: “IP65, two-string, 1,000 V dc combiner with fused string inputs.” That covers the essentials and gives them enough to quote accurately. For rural properties in Hampshire, Dorset, or Devon where outbuildings and exposed meter positions are common, rural solar installation considerations often make external combiner equipment more likely than on a standard suburban semi.
How Smarthometechnical assesses a consumer unit during a pre-solar survey
When Smarthometechnical carries out a pre-solar survey, the consumer unit inspection follows a consistent checklist. Knowing what to expect means you can have the right information ready and avoid a wasted visit.
The survey checklist covers:
- Visual board inspection: enclosure type (metal or plastic), condition, labelling, and access
- Busbar assessment: rating, number of ways, and spare capacity relative to the proposed system
- RCBO or RCD check: individual RCBO protection or shared RCD banks, and whether the existing protection is compatible with the inverter’s leakage characteristics
- SPD status: present, absent, or space provisioned
- Meter position and tails: location of the incoming supply, meter landlord details if applicable, and whether the DNO will need to be notified
- Inverter landing point: where the inverter AC output will connect and whether the cable route is clear
- Labelling: existing alternative supply labels and whether the board is correctly identified for emergency services
Questions worth having ready before the surveyor arrives:
- Who is your meter landlord or DNO? (Usually on your electricity bill)
- Has the board ever tripped unexpectedly or shown signs of overheating?
- How old is the current consumer unit, and do you have any previous electrical certificates?
- Where is the main switch, and is it accessible?
An installer’s perspective on why the pre-survey matters
Getting the consumer unit right before installation day is the single step that most often separates a smooth job from a delayed one. A board that looks fine from the outside can hide a shared RCD arrangement, a cramped busbar, or a plastic enclosure that makes the whole install non-compliant the moment we connect the inverter. Catching that at survey stage costs nothing. Catching it on installation day costs everyone.
If you are planning solar panels for your home, the best first step is a pre-survey with a competent, MCS-accredited installer. Smarthometechnical covers Dorset, Hampshire, and Devon, and every installation comes with a full Electrical Installation Certificate, commissioning sheet, and MCS documentation where applicable. Book a pre-survey and we will tell you exactly what your board needs before you spend a penny on panels.
Sources
- What Consumer Unit Do I Need for Solar PV?
- Solar Ready Electrical Panel: What It Is Future‑Proof Guide
- Solar Electric Ready Home
Recommended
- What is a solar ready home: your 2026 guide – Smart Home Technical Ltd
- The role of solar in 2026 homes: a complete guide – Smart Home Technical Ltd
- How solar planning works: a homeowner’s guide 2026 – Smart Home Technical Ltd
- Solar panel installation explained for southern England – Smart Home Technical Ltd
