
Solar system fault finding in Hampshire means using inverter fault codes, CT clamp tests, and remote diagnostics to identify why your system has stopped working or underperforming. Most faults fall into three categories: inverter errors, configuration problems, and monitoring failures. The good news is that a structured approach lets you diagnose the majority of issues yourself before calling a professional. This guide covers the exact checks to run, the tools you need, and when remote diagnostics from a qualified team like Smarthometechnical will save you time and money.
What are the most common solar faults in Hampshire?
Inverter faults are the most common reason a solar system appears to have stopped producing. The inverter is the brain of your system, and when something goes wrong, it logs an alphanumeric fault code that tells you exactly what happened. That code is your starting point for every diagnostic session.
Before you look at the inverter, check your consumer unit. A tripped solar circuit breaker is one of the most frequent causes of a system appearing dead, and it takes thirty seconds to rule out. Reset any tripped breakers, wait two minutes, and watch whether the inverter restarts.
Common faults Hampshire homeowners encounter include:
- Inverter fault codes such as grid voltage errors, isolation faults, or communication failures
- Tripped AC or DC isolators caused by surge events or component ageing
- Monitoring offline where the system is generating normally but the app shows no data
- Export limiting at near-zero caused by reversed CT clamps or misconfigured export settings
- Battery not charging despite good solar generation, often linked to charge schedule errors
Weather, recent firmware updates, and changes to your broadband router can all trigger faults that look more serious than they are. A system that stopped working the morning after a router change almost certainly has a Wi-Fi connectivity fault, not a hardware failure.
Pro Tip: Write down the exact fault code before you do anything else. Codes are manufacturer-specific and alphanumeric. A code like “F01” on a Solis inverter means something entirely different from the same code on a GivEnergy unit.
How to test CT clamps and why their direction matters
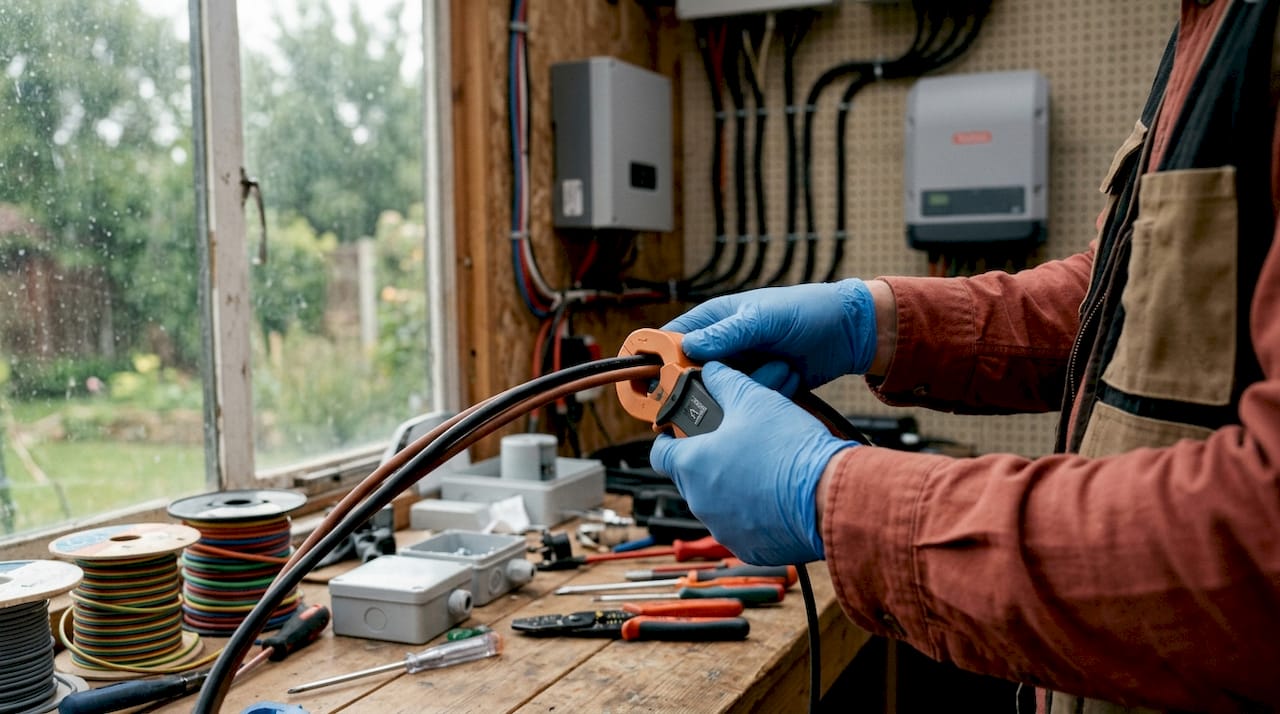
CT clamps measure the current flowing in and out of your property at the grid connection point. They are directional. A reversed CT clamp causes the inverter to misread import and export figures, which leads directly to export limiting faults and battery charging failures.
The kettle test is the fastest way to verify clamp direction without specialist equipment. Follow these steps:
- Open your inverter monitoring app and note the current grid import reading.
- Plug in a 2–3 kW kettle and switch it on.
- Watch the grid import figure on the app.
- A rise in the import reading confirms the CT clamp is correctly orientated.
- A fall or no change confirms the clamp is reversed and needs correcting.
| CT clamp result | What it means | Action required |
|---|---|---|
| Import reading rises | Clamp correctly fitted | No action needed |
| Import reading falls | Clamp reversed | Professional refit required |
| Reading stays flat | Clamp fault or disconnected | Professional inspection required |
CT clamps are frequently the overlooked cause of export limiting and battery charging failures. Many homeowners spend weeks chasing inverter settings when the fix is a five-minute clamp reversal by a qualified engineer.
Pro Tip: The kettle test works best when solar generation is low, such as early morning or on an overcast day. High solar output can mask the import change and give a misleading result.
How to interpret inverter fault codes
Inverter fault codes appear in three places: the physical display on the inverter unit, the manufacturer’s monitoring app, and the installer portal. Each source gives you different levels of detail.
- Physical display: shows the current active fault code, useful for immediate identification
- Monitoring app: shows recent fault history with timestamps, accessible from your phone
- Installer portal: provides raw event logs with system state at the exact moment of fault, giving the most complete picture for diagnosis
Recording the exact code matters because codes are manufacturer-specific. A code on a Solis inverter, a SolarEdge unit, or a GivEnergy battery system each reference entirely different fault libraries. Searching online for a generic code without the brand name will give you the wrong answer.
Common fault types in Hampshire systems include grid voltage faults triggered by local grid fluctuations, isolation faults caused by moisture ingress in ageing DC wiring, and communication faults from RS485 meter connections losing signal. Intermittent RS485 or meter communication failures produce symptoms that closely mimic hardware faults, which is why log timestamps matter so much.
Safety warning: Never attempt to open the inverter casing or touch DC wiring. DC voltage from solar panels is present even with the AC isolator switched off. If your fault code indicates an isolation fault or arc fault, stop diagnostics and contact a qualified engineer immediately.
When a simple reboot is appropriate, switch off the AC isolator, wait sixty seconds, then switch it back on. If the same fault code returns within minutes, a reboot will not fix it and the fault needs professional attention.
What are remote solar diagnostics and when should you use them?
Remote solar diagnostics is a service where a qualified engineer connects to your inverter and monitoring platform without visiting your property. A typical remote session takes approximately 30 minutes and covers fault log review, generation data analysis, and live configuration checks.
| Diagnostic method | Time required | Best suited for | Limitations |
|---|---|---|---|
| Remote diagnostics | 30 minutes | Configuration faults, CT clamp issues, export limits, charge schedules | Cannot replace physical components |
| On-site inspection | Half day or more | Hardware faults, wiring issues, physical damage | Higher cost, longer wait time |
| Self-diagnosis | Variable | Breaker checks, code reading, kettle test | Limited without monitoring access |
Remote diagnostics reduce cost and downtime by resolving configuration errors in a single session, reserving site visits for genuine hardware problems. For Hampshire homeowners, this is particularly useful because many faults, such as export limits set too low, reversed CT clamps, or incorrect charge schedules, are entirely software-based.
A remote session typically ends with a written report detailing what was found, what was corrected, and what next steps are needed. A full solar system health check, which audits twelve or more months of generation and battery data, is a separate service suited to homeowners who want reassurance rather than fault resolution.
Some faults appear electrical but are actually configuration errors, such as export limits set to near zero, reversed CT clamps, or grid-code mismatches. These produce near-zero export symptoms that look identical to hardware failures. Remote diagnostics catch these in minutes.
What tools and safety checks do you need before starting?
Preparation prevents mistakes and keeps you safe. Gather these before you begin any solar panel troubleshooting in Hampshire:
- Multimeter: for checking AC voltage at the consumer unit if needed
- Monitoring app access: logged in and showing live data before you start
- Inverter display access: physically locate the inverter and confirm you can read the screen
- Pen and paper or phone: to record fault codes, timestamps, and symptoms
- Your original installation documentation: contains inverter model, serial number, and installer contact details
Safety rule: Never touch DC cables, connectors, or the inside of the inverter. Do not work on the roof. Do not open junction boxes. These tasks require a qualified electrician. Your role in fault finding is observation, recording, and testing at the consumer unit level only.
Document everything before you change anything. Note the fault code, the time it appeared, recent weather, and any changes made to the property such as new appliances, broadband changes, or building work. This information cuts diagnostic time significantly when you hand the job to a professional.
MCS MIS 3002:2025 updates effective from june 2026 introduce new compliance requirements on installation and fault diagnosis documentation. This means your installer has formal obligations around record-keeping, and you are entitled to request documentation of any fault diagnosis work carried out on your system.
Key takeaways
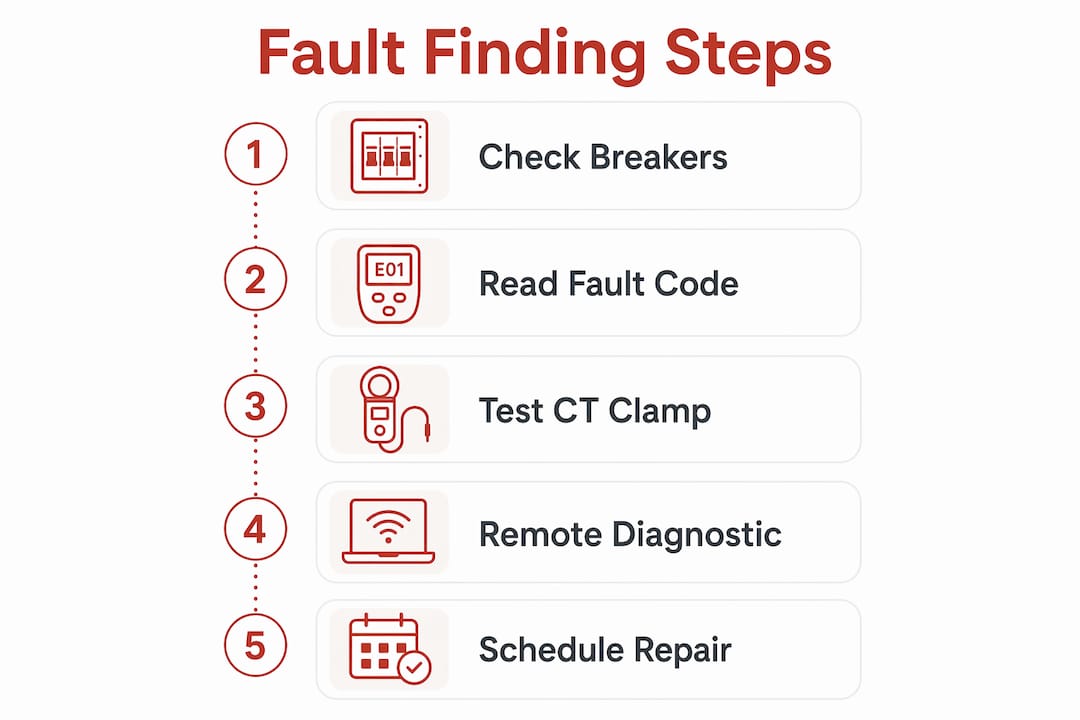
Effective solar system fault finding in Hampshire requires a structured sequence: check breakers first, read inverter codes second, verify CT clamp direction third, and use remote diagnostics before committing to an on-site visit.
| Point | Details |
|---|---|
| Start with breakers | A tripped AC or DC isolator is the simplest fault and takes seconds to rule out. |
| Record exact fault codes | Codes are manufacturer-specific; the wrong brand reference gives the wrong answer. |
| Test CT clamp direction | The kettle test confirms clamp orientation without specialist tools in under two minutes. |
| Use remote diagnostics first | A 30-minute remote session resolves most configuration faults without an engineer visit. |
| Document everything | Timestamps, codes, and recent changes cut professional diagnostic time significantly. |
What I have learnt from diagnosing solar faults across Hampshire
The single biggest mistake I see Hampshire homeowners make is skipping straight to the inverter settings before checking the basics. A tripped breaker or a disconnected CT clamp accounts for a large proportion of the calls we receive at Smarthometechnical. Spending ten minutes on the physical checks first saves everyone time.
The second thing I have noticed is how often homeowners misread monitoring data. A system showing zero generation on the app is not always a dead system. Monitoring connectivity faults are common, particularly after broadband router replacements. The inverter may be working perfectly while the app shows nothing. Always check the inverter display directly before assuming the worst.
Remote diagnostics have changed how we approach fault finding. The ability to correlate inverter event logs with generation graphs at exact fault timestamps means we can pinpoint transient faults that an on-site visit would miss entirely. I would always recommend a remote session before booking an engineer to travel to your property.
My practical advice: keep a note of your inverter model and serial number somewhere accessible, not just in the loft. When something goes wrong, that information is the first thing any diagnostic service will ask for. Routine annual checks on a hybrid solar battery system also catch configuration drift before it becomes a fault.
— Simon
Smarthometechnical: solar fault finding and repair in Hampshire
Smarthometechnical specialises in solar installations, battery storage, and EV charger installation across Hampshire. When your system develops a fault, the team offers structured diagnostics starting with a remote session to identify configuration errors quickly, followed by on-site repair where hardware issues are confirmed.
Every diagnostic engagement includes a written report with findings and recommended next steps. Whether you need a CT clamp refit, an inverter reset, or a full solar installation review, Smarthometechnical provides qualified, MCS-aware support for Hampshire homeowners. For properties with existing panels or those considering a retrofit, the Hampshire solar retrofits guide outlines what to expect from a professional assessment.
FAQ
What is the first step in solar system fault finding?
Check your consumer unit for tripped breakers before anything else. If breakers are clear, locate the inverter fault code on the display or monitoring app and record it exactly.
Can I fix a reversed CT clamp myself?
The kettle test lets you confirm whether a CT clamp is reversed, but the physical correction requires a qualified electrician. Attempting to refit clamps yourself risks incorrect installation and ongoing faults.
How long does a remote solar diagnostic take?
A remote diagnostic session typically takes approximately 30 minutes. The engineer reviews fault logs, generation data, and configuration settings, then applies fixes or provides a written report with next steps.
What does a near-zero export reading usually mean?
Near-zero export is most commonly caused by a reversed CT clamp, an export limit set too low, or a grid-code mismatch. These are configuration faults, not hardware failures, and are resolved remotely in most cases.
When should I call a professional instead of diagnosing myself?
Call a professional immediately if your fault code indicates an isolation fault, arc fault, or any warning involving DC wiring. Never open the inverter casing or touch roof-mounted components under any circumstances.
Recommended
- Solar system annual service Dorset: homeowner’s guide – Smart Home Technical Ltd
- Hybrid solar battery system hampshire: 2026 guide – Smart Home Technical Ltd
- Solar panel junction box repair dorset: 2026 guide – Smart Home Technical Ltd
- Solar in Hampshire retrofits: a homeowner’s guide – Smart Home Technical Ltd
